

Generating medical records by date/date range:
*Please note that when generating your medical records, both methods, Print My Chart and Download My Chart, do not have the option to filter by a specific provider or office location. If you require office visit notes from a specific provider/location, see the “Visits/Test Results” section below.*
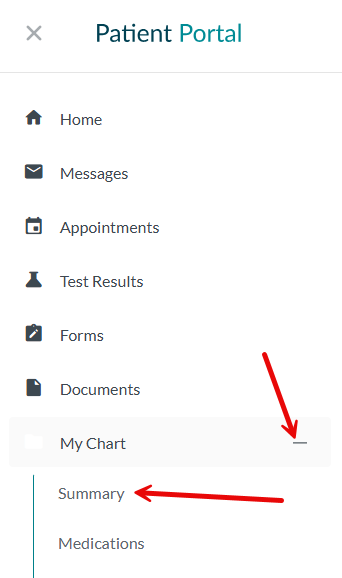
From the navigation menu, click the + next to My Chart and select Summary.
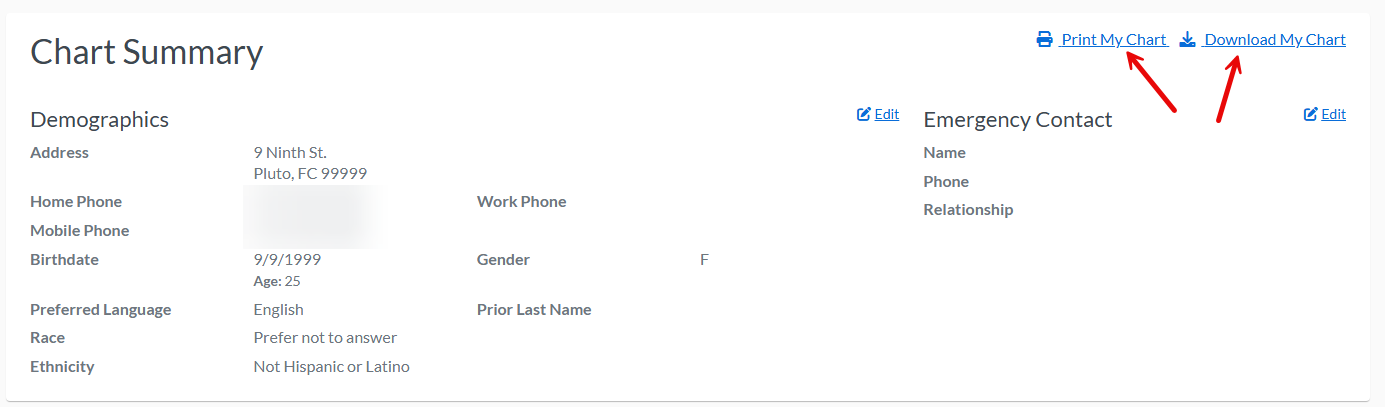
At the top of your chart summary, you will see your patient demographic information as well as the links to print or download your chart.
Print My Chart allows you to print a chart overview listing your demographic information, allergies, medications, lab results, etc.
Download My Chart will allow you to download or print complete office visit notes from a specific date or date range.
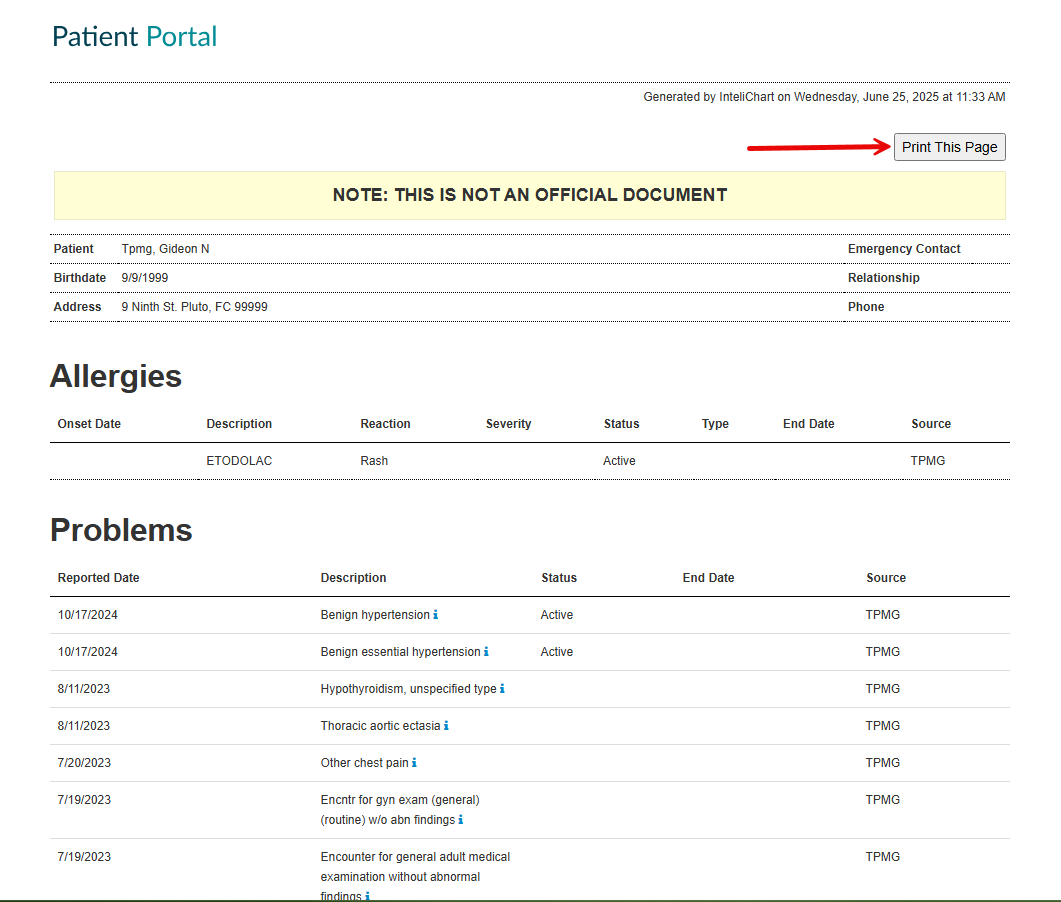
Selecting Print My Chart will generate your chart summary preview that can be printed by clicking the Print This Page button on the right.
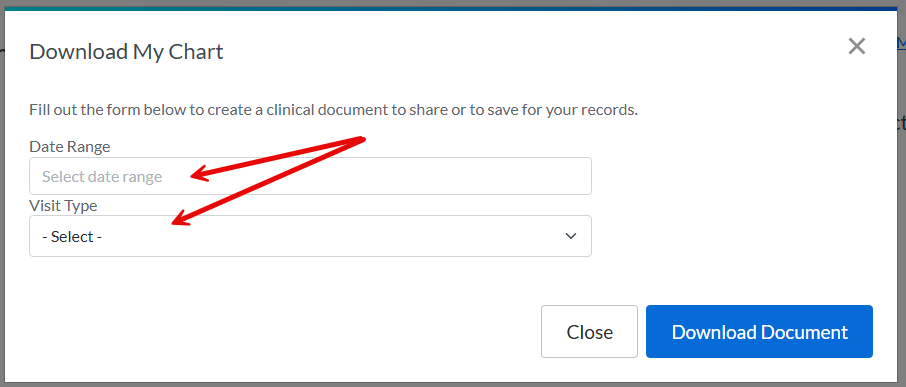
Selecting Download My Chart opens the download filter window, where you must select a Date Range and Visit Type.
Choose a preset date range option or select Custom Range.

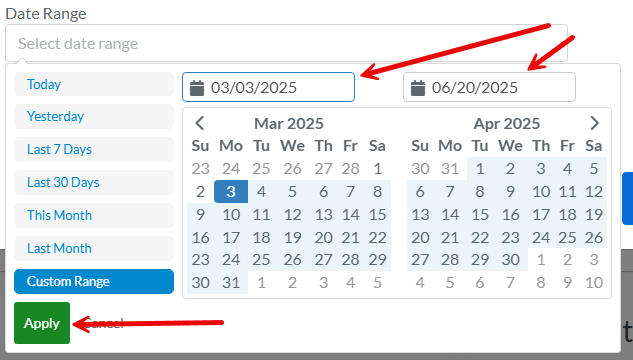
When selecting a custom range, confirm your chosen dates appear correctly in the boxes at the top, then click Apply.
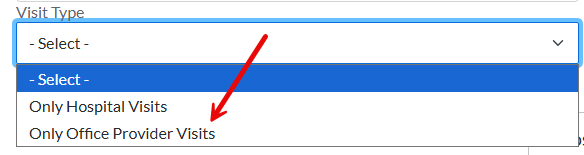
Select Only Office Provider Visits from the Visit Type drop down.
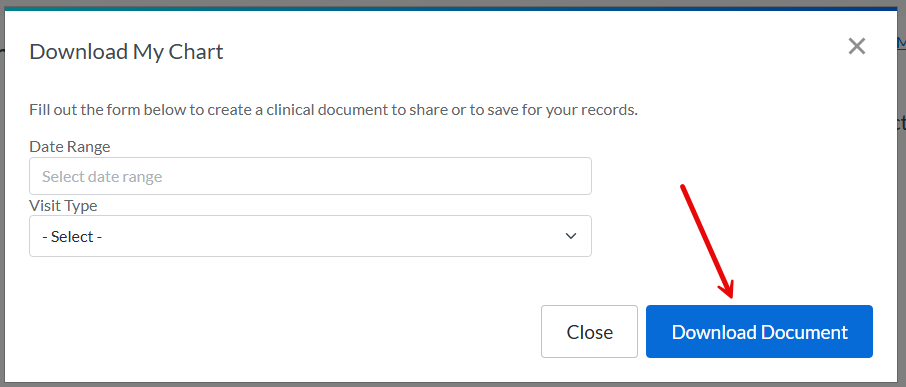
Once your Date Range and Visit Type have been selected click the Download Document button.
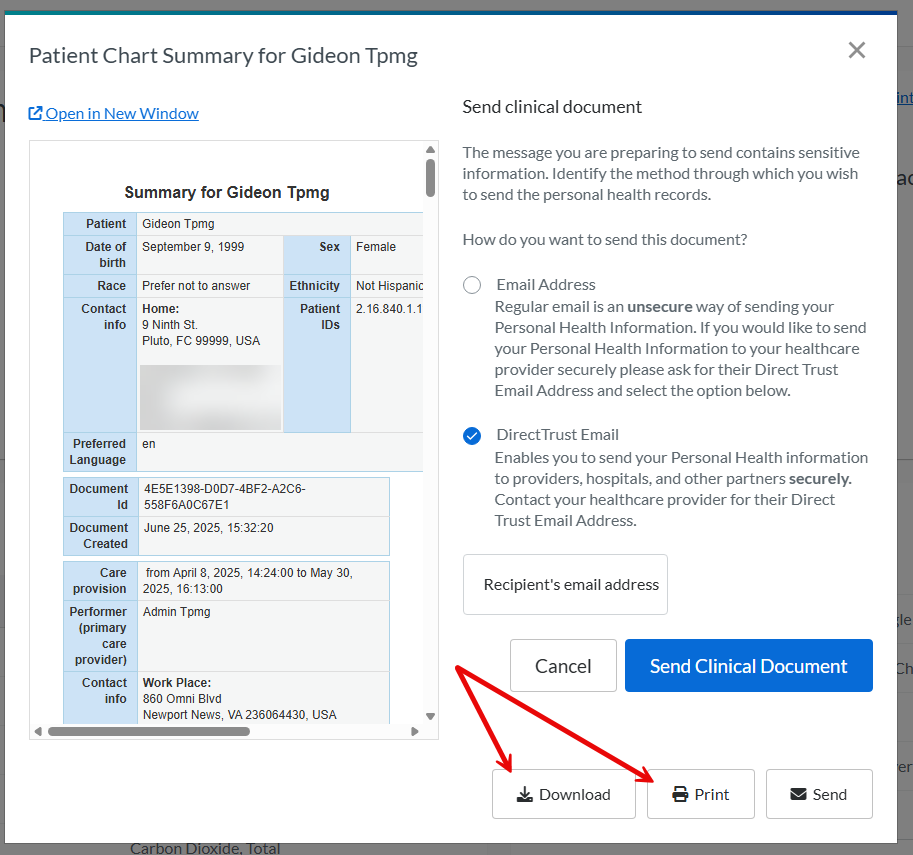
After a few moments your medical record will generate, and the chart summary window will open.
From this window you can choose to send, download or print your medical record.
*It is recommended to either Download or Print your records. However, if the office you are sending records to has provided a DirectTrust Email address you may use this option as a secure method of transferring records. Standard email is not encrypted and is not generally recommended for sharing medical records.
Visits/Test Results:
To print medical records for a specific provider or location, you can do so through the Visits and Test Results pages of the portal.
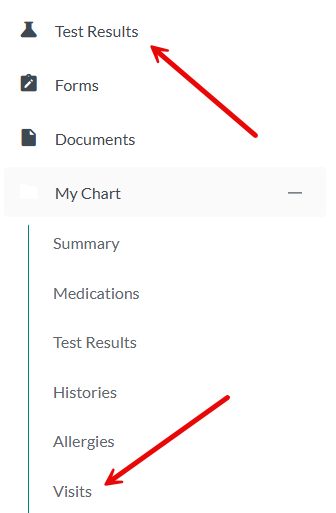
From the portal navigation menu, select Test Results or click the + next to My Chart and choose Visits from the list.
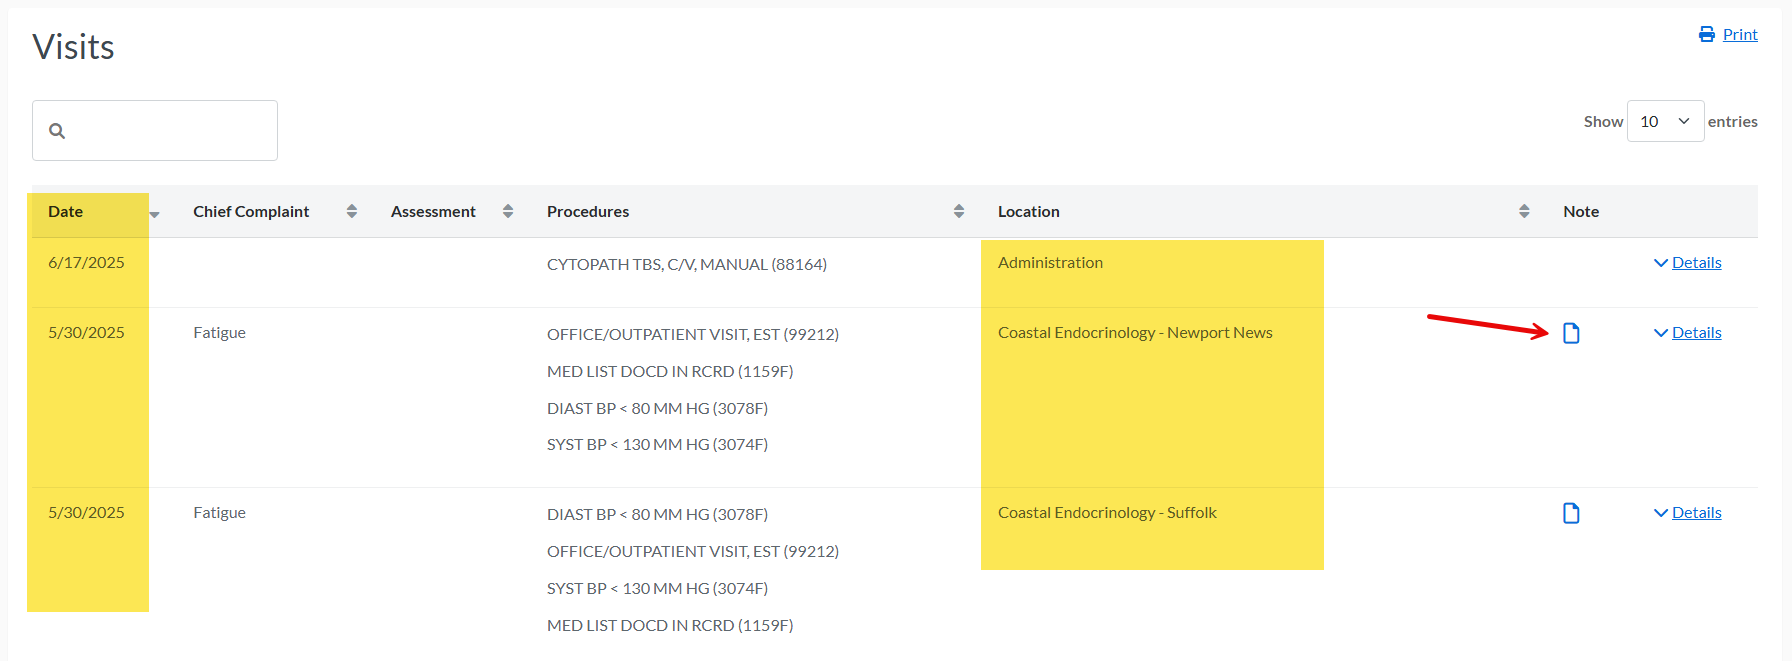
The Visits page will display office visits in chronological order and list the office location.
Click the document icon on the right to save the office visit note as a PDF. Once it has been saved to your personal device, it can be printed.
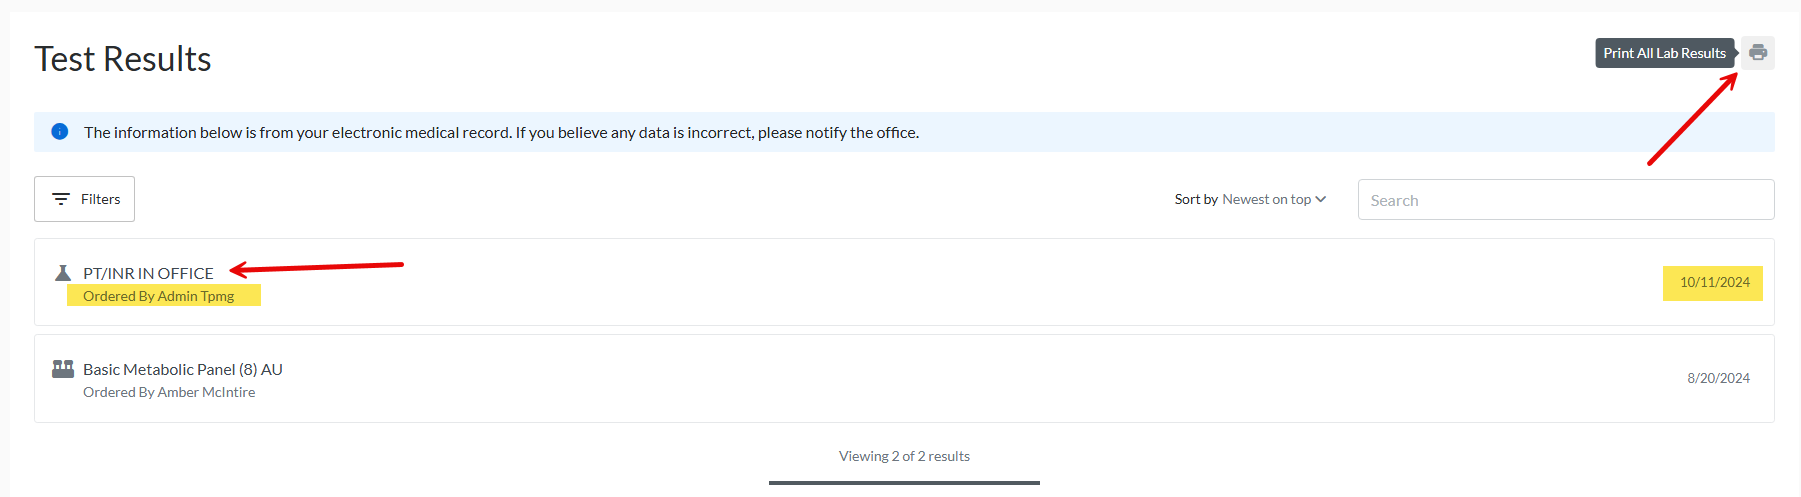

The Test Results page also displays results in chronological order but instead of the office location, you will see the ordering provider under the test name.
Select the Print Icon in the top right to print all lab results or click on the name of the lab to print individual test results.